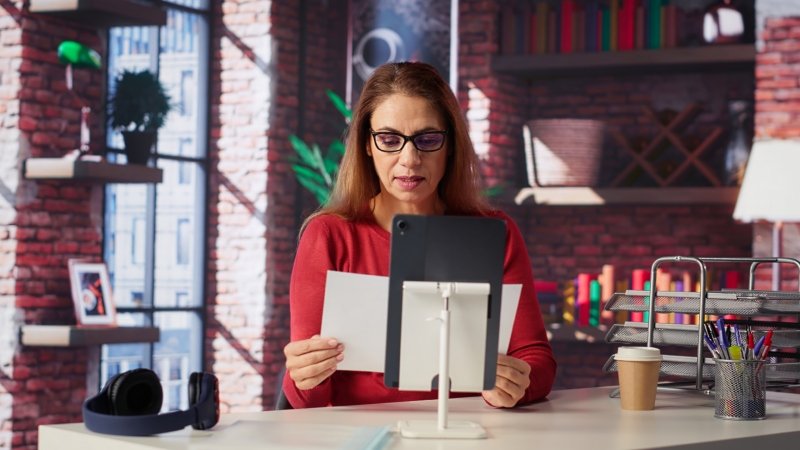
A great online biography tells a person’s story through both words and pictures. However, blurry portraits, poorly cropped images, and large photo files can make even an interesting life story less engaging. Preparing photos for an online biography involves selecting meaningful images, improving their appearance, optimizing file sizes, and presenting them in a way that supports the written content. With a few practical steps, you can create a polished visual story that looks professional and loads smoothly on different devices.
Why Are High-Quality Photos Important for an Online Biography?
Photos give readers a personal connection to the individual featured in a biography. A well-chosen portrait can communicate personality, confidence, and character before someone reads the first paragraph. Similarly, childhood pictures, career milestones, and family photographs can help readers understand the experiences that shaped a person’s life.
For online publications such as Global Life Mag, photographs can add depth to stories about personal achievements, professional journeys, and inspiring individuals. Instead of simply describing an important moment, a relevant image allows readers to see part of that experience. This makes a biography more memorable and easier to follow.
However, image quality matters just as much as image selection. A distorted photograph or an image that takes too long to load can distract readers. Using a JPG compressor helps reduce photo file sizes while preserving the visual detail needed for a professional presentation. When combined with careful editing and proper formatting, image optimization creates a smoother reading experience.
Key Takeaway: High-quality biography photos build trust, strengthen storytelling, and help readers connect with the person behind the story.
How Do You Choose the Right Photos for a Biography?
Selecting photographs is the first step in preparing an engaging online biography. Not every available picture deserves a place in the final article. The goal is to choose images that reveal something meaningful about the person’s identity, experiences, or achievements.
Begin with a clear, recent portrait that shows the subject naturally. For a professional biography, a headshot with good lighting and a simple background often works well. For a personal life story, a relaxed portrait may better reflect the individual’s character. The photo should match the tone of the biography rather than follow a rigid style.
Next, select supporting images that represent important stages of the person’s journey. These may include:
- Childhood or early-life photographs that provide background.
- Graduation pictures that show educational milestones.
- Workplace images that highlight professional development.
- Event photographs that capture awards or achievements.
- Family photographs that offer personal context.
- Community involvement pictures that reflect meaningful contributions.
Each image should serve a purpose. For example, a biography about an entrepreneur might feature an early workspace, a product launch, and a recent professional portrait. Together, these pictures create a visual timeline that complements the written story.
Avoid adding too many similar photographs. Five relevant images often tell a stronger story than fifteen repetitive ones. Also, confirm that you have permission to publish photographs, especially when they feature family members, colleagues, or private events.
Key Takeaway: Choose photographs that support the biography’s narrative, represent meaningful milestones, and reflect the subject’s personality.
What Image Size and Resolution Should You Use?
Image dimensions play an important role in how photographs appear on websites. Photos that are too small may look blurry when displayed on larger screens. Meanwhile, unnecessarily large images can increase page weight and slow down loading.
Image resolution describes the number of pixels in a photograph, usually expressed as width multiplied by height. For instance, an image measuring 1200 × 800 pixels contains more visual information than one measuring 600 × 400 pixels.
For many online biography layouts, the following dimensions provide reasonable starting points:
| Image type | Suggested dimensions |
| Profile portrait | 800 × 800 pixels |
| Featured biography image | 1200 × 800 pixels |
| Supporting photograph | 1000 × 667 pixels |
| Small thumbnail | 400 × 400 pixels |
| Wide banner | 1600 × 900 pixels |
These are general guidelines, not fixed publishing rules. The final dimensions should match the website’s layout and content management system.
Always check the photograph’s original size before resizing. Enlarging a small picture cannot restore missing detail. Instead, use the highest-quality original available and create appropriately sized copies for publication.
It is also helpful to preserve the original aspect ratio unless you intentionally crop the image. Stretching a photograph to fit a fixed space can make faces and objects appear unnatural.
Key Takeaway: Use image dimensions that match the website’s display requirements, and avoid enlarging low-resolution photographs.
How Can You Compress Photos Without Losing Important Details?
Large image files can affect website performance, especially when a biography includes several photographs. Compression reduces the amount of data stored in an image, making it easier to upload, download, and display.
Image compression is the process of reducing file size through changes in how image data is stored. Lossless compression preserves the original information, while lossy compression removes some image data to achieve smaller files.
Key Takeaway: Image compression makes photographs easier to load and share. The best setting reduces file size without making faces, text, or other important details look noticeably worse.
For most standard photographs, JPEG is a practical format because it offers a useful balance between image quality and file size. A JPG compressor can reduce the size of portraits, event photographs, and other biography images without requiring advanced editing skills.
Follow these steps to compress photographs effectively:
- Start with the original image. Avoid repeatedly editing previously compressed copies.
- Resize the image first. Match its dimensions to the website’s intended display size.
- Choose a suitable compression level. A JPEG quality setting around 75 to 85 can be a useful starting point, although results vary by image and software.
- Inspect the compressed version. Zoom in on facial features, hair, clothing, and background details.
- Compare file sizes. Keep the smaller version when the visual difference is minimal.
- Save a separate copy. Preserve the original photograph for future use.
For example, a high-resolution portrait might occupy several megabytes before optimization. Resizing and compressing it can reduce its file size significantly, depending on the photograph’s content and original format.
According to Google’s web.dev image optimization guidance, selecting suitable image formats, dimensions, and delivery methods helps improve website performance.
Key Takeaway: Resize photographs before compression, inspect the results, and preserve the original files to maintain quality across future publications.
How Do You Crop and Edit Photos for a Professional Appearance?
Cropping and editing can improve an image’s appearance without changing its meaning. The goal is to remove distractions, correct minor problems, and direct the reader’s attention toward the subject.
Start by examining the composition. In a portrait, the person’s face should remain clear and naturally positioned. Avoid cropping too tightly around the forehead or chin. Leaving some space around the subject often creates a more balanced image.
When editing, focus on a few essential improvements:
- Brightness: Adjust exposure so the subject is clearly visible.
- Contrast: Improve the distinction between light and dark areas.
- White balance: Correct unnatural color tones caused by lighting.
- Sharpness: Apply gentle sharpening when necessary.
- Straightening: Fix tilted horizons or architectural backgrounds.
- Background cleanup: Remove minor visual distractions without misrepresenting the scene.
Be careful with heavy filters and excessive retouching. A biography should present an authentic image of the person. Altering facial features, removing meaningful objects, or changing important details can weaken that authenticity.
Consistency also matters. If one image has warm colors and another looks unusually blue, the collection may feel disconnected. Small adjustments to brightness and color can help photographs look more cohesive.
Key Takeaway: Edit biography photographs for clarity and consistency while preserving the subject’s natural appearance and the image’s authenticity.
Which Image Format Works Best for Online Biography Photos?
Choosing the right image format affects image quality, compatibility, and file size. Although several formats are available, each serves a different purpose.
JPEG, commonly identified by the .jpg or .jpeg extension, works well for standard photographs. It handles complex colors and natural details efficiently, making it suitable for portraits and personal event images.
PNG is useful when an image requires transparency or contains graphics with sharp edges. However, PNG photographs can produce larger files than comparable JPEG images.
WebP supports both lossy and lossless compression and can provide efficient image delivery on modern websites. AVIF is another modern format that may offer smaller files at comparable visual quality, depending on the image and encoding settings.
For biography publishing, consider these choices:
| Format | Best use |
| JPG/JPEG | Portraits, family photos, event images |
| PNG | Logos, graphics, transparent backgrounds |
| WebP | Optimized photographs and website images |
| AVIF | Efficient delivery where supported by the publishing workflow |
Your website’s content management system may automatically generate optimized image versions. Check its supported formats before converting every photograph manually.
Modern image formats can offer performance advantages, but the best option depends on compatibility, visual quality, and the publication’s technical setup.
Key Takeaway: JPEG remains a practical choice for biography photographs, while WebP and AVIF offer additional optimization options for compatible websites.
How Can You Make Biography Photos Accessible and Search-Friendly?
Photo preparation involves more than visual appearance. Search engines and assistive technologies also benefit from clear descriptions and organized image information.
One of the most useful elements is alt text, which is a short written description of an image. Screen readers can use alt text to communicate meaningful visual content to people who cannot see the photograph.
Key Takeaway: Effective alt text explains the image’s purpose in context. It should describe meaningful visual information rather than repeat keywords.
For example, instead of using generic alt text such as “biography photo,” write something more descriptive:
“Entrepreneur speaking at a community business event.”
This gives readers useful context and explains what the photograph shows. If an image is purely decorative, it may not need descriptive alt text.
File names should also be clear and organized. Replace automatic camera names such as IMG_5834.jpg with meaningful alternatives, such as entrepreneur-community-event.jpg.
Avoid stuffing keywords into filenames or alt text. Search optimization should support understanding rather than interfere with readability.
Captions can also improve the story. A caption might identify the event, explain its importance, or provide the year when the photograph was taken. This helps readers understand how each picture relates to the person’s life.
Key Takeaway: Use descriptive filenames, meaningful alt text, and informative captions to improve accessibility and help readers understand each photograph.
How Do You Protect Privacy and Authenticity Before Publishing?
Biography photographs often contain personal information beyond what appears in the picture. Camera files may include metadata such as capture dates, device details, and sometimes location information.
EXIF metadata is information stored within certain image files. Depending on the camera and settings, it can include technical details and GPS coordinates.
Key Takeaway: Review photo metadata before publication to avoid sharing unnecessary personal information, especially location details.
Before uploading personal photographs, inspect their metadata and remove details that should remain private. This is especially important for images taken at private homes, schools, or personal gatherings.
Photo authenticity deserves equal attention. Readers expect biographical photographs to represent real people and genuine moments. If an image has undergone substantial manipulation, consider whether a disclosure is appropriate.
Also, verify dates, locations, and event descriptions before writing captions. An incorrect caption can create confusion even when the photograph itself is genuine.
For older photographs, retain the original scans and record any restoration work. Small corrections to fading or scratches can improve readability, but major changes should not alter the historical meaning of the image.
Key Takeaway: Protect personal information, verify photo details, and avoid misleading edits to maintain trust in the biography.
What Should You Check Before Uploading Biography Photos?
After selecting, editing, and optimizing the photographs, complete a final review. This helps catch technical and visual problems before the biography goes live.
Use this publishing checklist:
- Confirm that every photograph relates to the biography.
- Check image permissions and publication consent where needed.
- Verify that the subject remains clear after cropping.
- Use suitable dimensions for the intended layout.
- Compress large files without excessive quality loss.
- Choose formats supported by the website.
- Add meaningful filenames and alt text.
- Review captions for accuracy.
- Remove sensitive metadata.
- Preview the article on desktop and mobile screens.
- Check that all images load correctly.
Mobile previews are particularly important. A portrait that looks balanced on a desktop may crop awkwardly on a narrow screen. Responsive layouts can also change how captions and surrounding text appear.
Finally, examine the order of images within the biography. A strong opening portrait followed by milestone photographs often creates a natural visual sequence. The photographs should guide readers through the person’s story rather than interrupt it.
Key Takeaway: A final review of quality, accessibility, privacy, and mobile appearance helps ensure that biography photographs are ready for publication.
Frequently Asked Questions
1. What is the best image size for an online biography?
A profile portrait around 800 × 800 pixels and a featured image around 1200 × 800 pixels can work well for many websites. However, the ideal size depends on the publication’s layout and image requirements.
Key Takeaway: Match image dimensions to the website instead of using one fixed size for every photograph.
2. Can I compress biography photos without making them blurry?
Yes. Start with a high-quality original, resize it to the required dimensions, and apply moderate compression. Always inspect the result to make sure facial features and important details remain clear.
Key Takeaway: Careful resizing and moderate compression can reduce file sizes while maintaining good visual quality.
3. Should biography photos use JPG or PNG?
JPG usually works better for photographs because it supports efficient compression. PNG is more suitable for images that require transparency or contain certain types of graphics.
Key Takeaway: Use JPG for most biography photographs and PNG when transparency or graphic detail requires it.
4. How many photographs should an online biography include?
There is no universal number. A short biography may need one portrait, while a longer life story can benefit from several milestone photographs. Choose images based on relevance rather than quantity.
Key Takeaway: Use enough photographs to support the story without overwhelming readers.
5. Do image file names and alt text help with SEO?
Descriptive filenames provide context, while meaningful alt text supports accessibility and helps search systems understand image content. Both should describe the photograph accurately without unnecessary keyword repetition.
Key Takeaway: Clear filenames and useful alt text improve image context and accessibility.
Conclusion
Preparing photographs for an online biography requires a balance of storytelling, technical quality, and responsible publishing. The strongest results come from choosing meaningful images, correcting visual issues, resizing files, and applying appropriate compression. Just as importantly, descriptive alt text, accurate captions, and privacy checks help make the biography accessible and trustworthy.
A carefully prepared photo collection can turn a simple written profile into a more engaging life story. Whether the biography features a professional, an entrepreneur, an artist, or someone with an inspiring personal journey, every photograph should contribute something valuable.
Key Takeaway: Prepare biography photos by selecting authentic images, improving their visual quality, optimizing file sizes, protecting privacy, and adding accessible descriptions. These steps create a stronger reading experience while supporting website performance, search visibility, and long-term content quality.